No Tank, No Problem – Your Guide to Eccotemp i12 LP Installation
Why Proper Eccotemp i12 LP Installation Matters
Eccotemp i12 lp installation requires careful attention to gas lines, venting, and clearances to ensure safe, efficient operation. Getting it right means endless hot water for your home - getting it wrong can void your warranty and create safety hazards.
Essential Installation Steps:
- Mount unit with proper clearances (12" from top, 6" from sides)
- Connect water lines using ¾" piping for optimal flow
- Install gas line rated for minimum 80,000 BTU capacity
- Route 2.5" stainless steel vent with ¼" per foot slope
- Connect 120V power to GFCI-protected outlet
- Test system for leaks and proper ignition
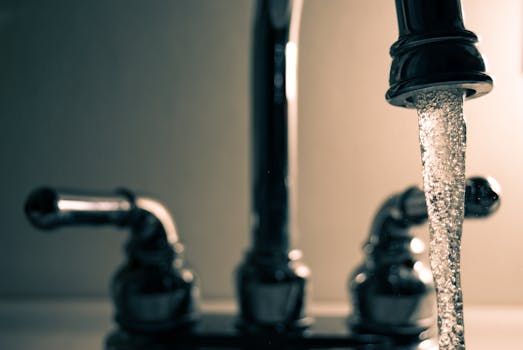
The i12-LP delivers 4.0 GPM at 80,000 BTU, supporting 1-2 fixtures simultaneously with a 38°F temperature rise. Professional installation is mandatory to meet safety codes and maintain your 5-year heat exchanger warranty.
Common installation mistakes include using undersized ½" water lines instead of ¾", inadequate gas line capacity, and improper vent slope - all leading to poor performance or error codes.
I'm Mike Martinez AHP, owner of Accountable Home Plumbing with over a decade of tankless water heater experience throughout the Denver Metro area. I've guided hundreds of homeowners through eccotemp i12 lp installation projects, ensuring code compliance and optimal performance. Let me walk you through the complete process step-by-step.
Know Your i12-LP: Specs, Features & Safety
Before diving into your eccotemp i12 lp installation, let's get acquainted with what makes this unit tick. The i12-LP isn't just another water heater - it's a compact powerhouse designed to deliver endless hot water while fitting into tight spaces.
This unit packs serious performance into a surprisingly small package. With 4.0 GPM flow rate and 80,000 BTU output, it handles 1-2 fixtures running simultaneously without breaking a sweat. What really impressed me during installations is the 0.5 amp power draw- your electric bill won't even notice it's there.
The 0.7 GPM ignition flow is where this unit shines. Most tankless heaters need higher flow rates to fire up, leaving you with that annoying cold water sandwich between uses. The i12-LP kicks on almost instantly, even with a gentle faucet flow.
The LED touch panel makes temperature adjustments foolproof - just use the up and down arrows to dial in your perfect temperature. The child-lock feature gives parents peace of mind, preventing little hands from cranking up the heat to dangerous levels.
Safety wasn't an afterthought here. The overheat sensor monitors temperatures constantly, while the UL-listed power cord meets strict electrical safety standards. Just remember - this unit is tested up to 2,000 feet elevation, so high-altitude homes need special consideration.
For complete technical specifications, check the i12 SERIES manual PDF. Trust me, it's worth reading before you start your project.
Understanding Flow Rate & Temperature Rise
Here's where things get interesting - and where many DIYers get confused. The i12-LP delivers a 38°F temperature rise at maximum flow. Sounds simple, right? Well, your incoming water temperature changes everything.
Let's say your incoming water is 50°F in summer. At full 4.0 GPM flow, you'll get 88°F water - perfect for washing dishes, but not quite hot enough for a comfortable shower. Here's the trick: reduce the flow slightly, and the temperature jumps dramatically.
Cold climate impact is real, especially here in Denver. Winter incoming water can drop to 40°F or even lower. Suddenly, that same 38°F rise only gets you to 78°F - definitely not shower-friendly. But don't panic - the unit's built-in flow restrictor lets you balance temperature and flow perfectly.
I always tell homeowners to think of it like a garden hose with your thumb over the end. Restrict the flow a bit, and the pressure (in this case, temperature) increases. The i12-LP's flow restrictor works the same way - adjust it toward the "-" setting to slow flow and boost your outlet temperature.
During winter months, most of my customers find they need to dial back their flow expectations slightly. The unit still delivers the same 80,000 BTU output, but physics means colder incoming water requires either reduced flow or slightly lower outlet temperatures.
Safety Certifications & Warranty Coverage
Let's talk about protecting your investment - because nothing's worse than voiding your warranty with a sloppy installation. The i12-LP comes with solid coverage: 5-year heat exchanger warranty and 2-year parts coverage. But here's the catch - proper installation is absolutely mandatory.
The UL-listed cord meets electrical safety standards, giving you confidence in the unit's electrical components. However, warranty coverage depends entirely on following installation guidelines to the letter.
I've seen too many homeowners try to cut corners, only to face warranty denial later. Improper installation voids coverage- and manufacturers are getting stricter about enforcement. This includes using undersized gas lines, incorrect clearances, or improper venting.
The 12-inch top clearance isn't a suggestion - it's a safety requirement that affects your warranty. Same goes for gas line sizing. That gas line must handle the full 80,000 BTU capacity, not just barely squeak by.
Professional installation isn't just recommended for indoor LP units - it's often required to maintain warranty coverage. Before starting your project, review the Manufacturer's Guidelines thoroughly.
This isn't about following rules for the sake of rules. These requirements exist because propane appliances demand respect. Get the installation right, and you'll enjoy years of reliable hot water. Cut corners, and you might face expensive repairs with no warranty backup.
Prep & Planning for a Smooth Install
Good eccotemp i12 lp installation doesn't start when you mount the unit on the wall - it starts weeks before with careful planning. I've watched too many weekend warriors turn a straightforward install into a three-day nightmare because they skipped this crucial step.
Think of it like cooking Thanksgiving dinner. You wouldn't start without checking your pantry, right? Same principle applies here. Let's make sure you have everything lined up before you touch a single pipe.
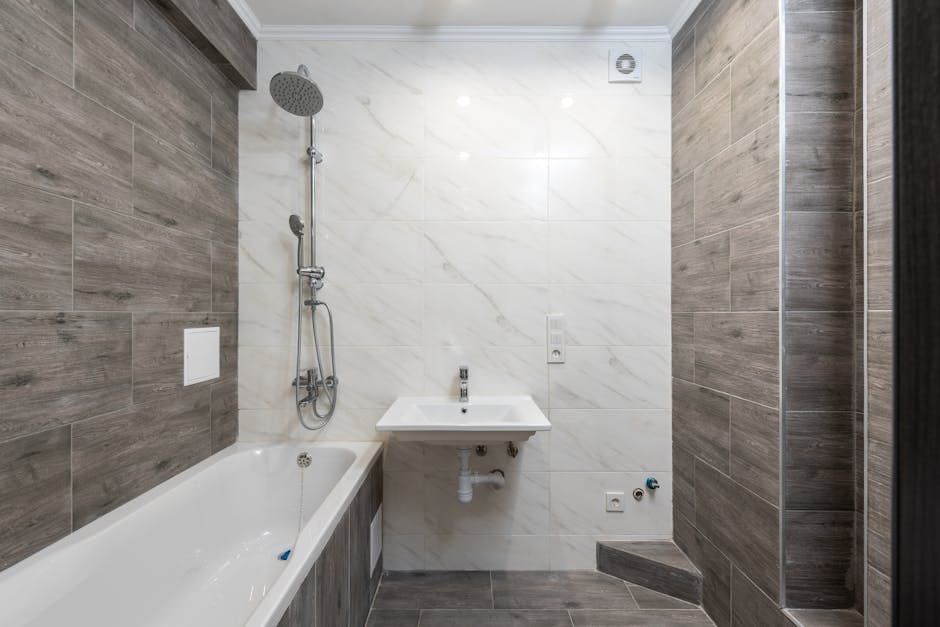
Location is everything. Your i12-LP needs an interior wall with solid structural support - we're talking real studs, not drywall anchors hoping for the best. The unit requires 12 inches of clearance from the top and 6 inches from the sides. This isn't a suggestion - it's a safety requirement that keeps your warranty intact.
The room needs access to combustion air and protection from freezing. I've seen units installed in unheated garages that never worked properly because the homeowner didn't consider winter temperatures.
Infrastructure makes or breaks your project. You absolutely need ¾-inch water supply lines- not the ½-inch lines that might already be there. The difference is dramatic. Half-inch lines will leave you with weak flow and frustrated family members wondering why the shower pressure disappeared.
Your LP gas line must handle at least 80,000 BTU. Undersized gas lines cause error codes and incomplete combustion. You'll also need the 2.5-inch stainless steel vent kit(thankfully included), a 120V GFCI outlet, and proper condensate drain routing.
Here's the reality about pipe sizing that most DIY guides gloss over: ½-inch water lines create flow restrictions that prevent the unit from reaching its 4.0 GPM capacity. You'll get activation issues and poor performance. ¾-inch water lines allow full flow and optimal operation. Similarly, ½-inch gas lines can't deliver sufficient BTU, leading to error codes, while ¾-inch gas lines provide the full 80,000+ BTU needed for reliable ignition.
Don't forget about permits. Most municipalities require permits for gas appliance installations. It's not just red tape - it ensures safety inspections that protect your family.
For professional installation throughout the Denver Metro area, including permit handling and code compliance, we're here to help with Water Heater Installation.
Site Selection & Clearance Requirements
Location choice can make or break your installation. I've seen homeowners pick spots that seemed perfect until we started the actual work. Let me save you that headache.
Never install in laundry rooms. Airborne lint creates serious fire hazards around gas appliances. I've seen lint buildup cause combustion problems and even unit failures. It's just not worth the risk.
Areas prone to freezing are another no-go. The i12-LP has internal components that can be damaged by freezing temperatures. Unheated basements, garages, and exterior walls without proper insulation spell trouble.
Your ideal spot has an interior wall with 16-inch on-center studs, fresh air supply free of contaminants, and room temperature that stays above 32°F year-round. You also want a clear path for routing the vent to the exterior - trust me, fighting through multiple wall cavities gets old fast.
Think about future maintenance access too. You'll need to descale this unit every 6-12 months, so don't box it into a tight corner where you can't reach the service valves.

Tools & Materials Checklist
Having the right tools prevents those frustrating mid-project hardware store runs. Nothing kills momentum like realizing you need a specific wrench when you're halfway through connecting gas lines.
Essential tools include a drill with both masonry and wood bits (you never know what's behind that drywall), a minimum 2-foot level for proper mounting, and pipe wrenches in 10-inch and 12-inch sizes. You'll also need a manometer for gas pressure testing- this isn't optional if you want safe operation.
Don't forget gas leak detector spray and a voltage tester for electrical connections. A pipe cutter and hacksaw handle the vent modifications you'll inevitably need to make.
Material-wise, the 2.5-inch stainless steel vent kit comes with your unit, but you'll need ¾-inch NPT fittings and isolation valves for the water connections. The LP gas line must be rated for at least 80,000 BTU - check the rating stamp before you buy.
Teflon tape and pipe sealant are must-haves for leak-free connections. Grab mounting hardware appropriate for your wall type, condensate drain piping, and an EZ-Flush descaling kit for future maintenance.
Pro tip: Buy 20% more fittings and supplies than you think you need. It's cheaper than making multiple trips to the hardware store, and you'll have spares for future maintenance.
Step-by-Step eccotemp i12 lp installation
Here's where the real work begins. I've walked hundreds of homeowners through this process, and the key is taking your time with each connection. One rushed step can turn into a costly mistake - or worse, a safety hazard.
The beauty of the i12-LP is that it's designed for DIY-friendly installation, but don't let that fool you into thinking corners can be cut. Every connection matters, and every clearance requirement exists for a reason.
For those considering outdoor installations, we also provide comprehensive guidance through our Outdoor Tankless Water Heater Installation service.
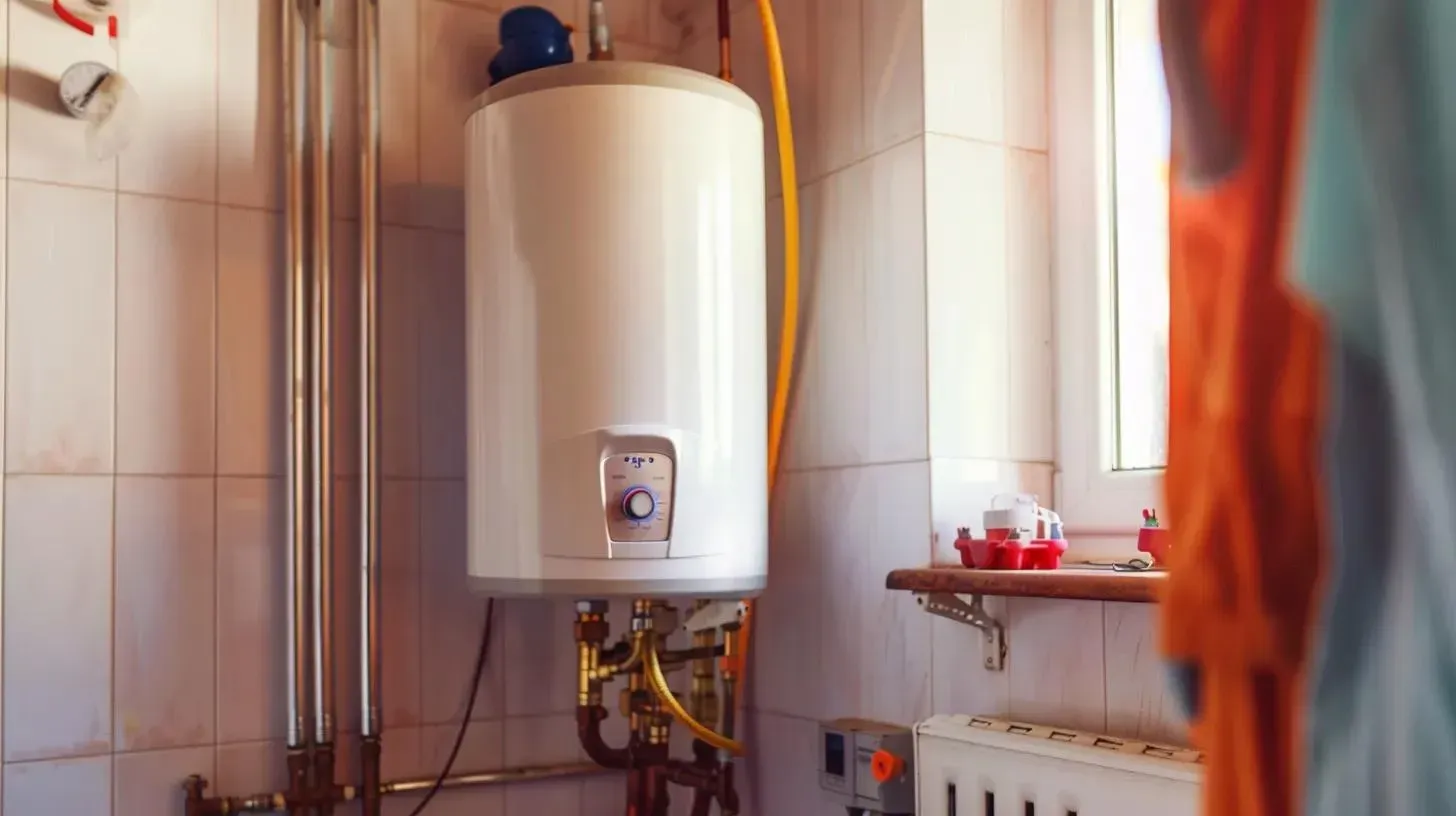
eccotemp i12 lp installation: Mounting & Water Connections
Getting the mount right is everything. A wobbly or improperly secured unit will vibrate, leak, and potentially fail prematurely. The i12-LP weighs about 35 pounds empty, but it'll be heavier once water fills the heat exchanger.
Start by finding your wall studs - and I mean actually finding them, not guessing. Use a stud finder or the old-fashioned knock test. Mark your mounting points using the template that comes with the unit, then double-check everything with a level before drilling a single hole.
Drill your pilot holes into the studs and secure the mounting bracket with heavy-duty lag bolts. When you hang the unit, it should feel rock-solid. If there's any wobble, take it down and start over.
Now comes the water connections, and this is where I see the most mistakes. The unit has ½" NPT connections, but remember - you need ¾" supply lines running to the unit for proper flow. Use reducing fittings right at the unit connections.
Install shut-off valves on both hot and cold lines before connecting to the unit. Trust me on this - you'll thank yourself later when you need to service the unit without draining your entire plumbing system.
Apply Teflon tape to all threaded connections, wrapping in the direction of the threads. Connect the cold water inlet on the right side(look for the blue marking) and the hot water outlet on the left(red marking).
Don't forget the pressure relief valve- this little safety device can save your home from serious water damage. Install it with a drain line that runs to an open drain or outside. Never cap or plug this valve, no matter how much you don't like where it drains.

eccotemp i12 lp installation: Gas, Vent & Electrical Hook-Up
Gas connections make most homeowners nervous- and that's actually a good thing. Healthy respect for gas lines keeps you careful and thorough. The i12-LP needs 10-13 inches of water column pressure for LP gas, and your gas line sizing directly affects whether you'll get that pressure.
Use minimum ½" black steel pipe or flexible gas line rated for at least 80,000 BTU. Here's the thing about gas lines - every elbow and fitting creates pressure drop, so keep your run as straight as possible.
Install a sediment trap(some folks call it a drip leg) before the unit. This catches debris and prevents it from reaching your water heater's gas valve. Add a manual shut-off valve within 6 feet of the unit - this is required by code and makes service work much safer.
When making gas connections, use pipe compound on the threads, never Teflon tape. Gas connections need a different approach than water connections. Thread everything hand-tight first, then use wrenches to snug everything up - but don't overtighten and crack the fittings.
Test every single gas connection with leak detector spray. I've seen too many "small" leaks turn into big problems. If you see bubbles, you have a leak. Fix it before moving on.
The venting installation is where attention to detail really pays off. That 2.5" stainless steel vent kit needs to be installed with ¼" per foot slope away from the unit. Why? Because these condensing units produce moisture, and that moisture needs somewhere to go besides back into your water heater.
You can terminate the vent horizontally through a wall or vertically through the roof- both work fine. Just make sure you're following the maximum vent length specifications in your manual. Connect the condensate drain properly, because this little detail prevents water damage down the road.
For the technical details on gas pressure requirements, check out the Gas Pressure & Performance guide.
The electrical connection is the easy part- the i12-LP only draws 0.5 amps to run the exhaust fan and controls. But it still needs 120V GFCI-protected power, and that outlet needs to be within 6 feet of the unit.
I recommend a dedicated circuit even though it's not strictly required. The UL-listed power cord comes with the unit, and proper grounding is essential for safe operation. Test your GFCI outlet before connecting - if it doesn't trip when you press the test button, call an electrician.
Testing, Temperature Adjustment, Maintenance & FAQs
You're almost there! But don't flip that gas valve just yet. Testing your eccotemp i12 lp installation properly is what separates a professional job from a potential disaster. I've seen too many DIY installations that looked perfect but failed at the testing stage.
The good news? Once you verify everything works correctly, you'll have endless hot water and peace of mind. Let's walk through each test methodically.
For ongoing maintenance support after your installation, explore our Routine Water Heater Maintenance services.
System Leak & Operation Tests
Think of this testing phase as your safety net. Every connection you made needs verification before you can call the job complete.
Start with gas leak testing- this is non-negotiable. Turn on your gas supply slowly and spray every single connection with leak detector solution. Look for any bubbles forming, which indicate escaping gas. Even tiny bubbles mean you need to tighten that connection. Don't skip this step - I've responded to emergency calls where homeowners thought "just a small leak" would be fine.
Next, test your water connections. Open those supply valves and check every joint for drips. The i12-LP operates under pressure, so even small leaks will worsen over time. Purge all air from the system by running hot water at fixtures until flow is steady.
Now for the moment of truth- first ignition. Turn on hot water at your nearest fixture and wait. The unit should fire up within 10-15 seconds. You'll hear the exhaust fan start, followed by the satisfying whoosh of ignition. If you see error codes on the LED display instead, don't panic - we'll cover those shortly.

Use a manometer to verify gas pressure falls within that critical 10-13 inches of water column range for LP gas. This isn't optional - wrong pressure causes everything from poor performance to dangerous incomplete combustion. If your reading is off, check for undersized gas lines or too many fittings creating pressure drop.
Setting Your Water Temperature
The i12-LP's LED control panel looks intimidating at first, but it's actually quite intuitive once you understand the logic.
Use the up and down arrows on the right side of the display to set your desired temperature. I recommend starting at 110-120°F for most households - hot enough for comfortable showers but not scalding. The display shows your current water temperature, then climbs to your set point as the unit heats up.
Here's where many homeowners get confused: winter performance differs significantly from summer. When incoming water drops from 60°F in summer to 40°F in winter, you'll notice the difference immediately. Your unit delivers the same 80,000 BTU, but heating 40°F water to 120°F requires more time and energy than heating 60°F water.
The solution? Adjust the flow restrictor toward the "-" position to slow water flow slightly. This gives the heat exchanger more time to work, maintaining your desired temperature. You can also reduce flow at individual fixtures if needed.
Don't forget to enable the child-lock once you've found your ideal temperature setting. Trust me - kids love pushing buttons, and scalding water is no joke.
For step-by-step instructions with photos, check out the Setting the Temperature Guide.
Routine Descaling & Filter Cleaning
Here's the truth about tankless water heater maintenance: ignore it at your own peril. Scale buildup is the number one killer of these units, and it's completely preventable with regular care.
Your i12-LP has a water inlet filter screen that catches debris before it reaches the heat exchanger. Check this every few months - a clogged screen reduces flow and can trigger error codes. It's a simple screen that pulls right out for cleaning.
Descaling frequency depends on your water hardness. With Denver's moderately hard water, I recommend every 6-12 months. If you notice decreased flow rate or longer heating times, don't wait - descale immediately. The included EZ-Flush kit makes this process straightforward, even for homeowners who've never done it before.
Beyond descaling, inspect your vent termination annually for bird nests, leaves, or other obstructions. Test the pressure relief valve by lifting the lever briefly - you should see water discharge. Check gas connections for any signs of corrosion, especially if your unit is in a humid location.
Verify proper vent slope remains intact. Sometimes settling or thermal expansion can change the slope over time, leading to condensation problems. That ¼" per foot slope away from the unit isn't just a suggestion - it prevents expensive water damage.
Top 3 FAQs
After hundreds of eccotemp i12 lp installation projects, these three questions come up constantly. Let me give you the real answers.
"Can I use ½" water lines with the i12-LP?" Absolutely not, and here's why. Yes, the unit has ½" NPT connections, but that doesn't mean your supply lines should be ½". Using undersized piping creates a bottleneck that prevents proper flow activation. You'll get error codes, poor performance, and frustrated family members. Always use ¾" supply lines with reducing fittings at the unit.
"Do I need a dedicated electrical circuit?" While code might not always require it, I strongly recommend a dedicated 20-amp GFCI circuit. The unit only draws 0.5 amps, but having dedicated power prevents nuisance trips from other appliances. I've seen units randomly shut down because someone plugged in a vacuum cleaner on the same circuit. For $200 in electrical work, you get peace of mind.
"What if water isn't hot enough in winter?" This is where understanding your unit's capabilities matters. Colder incoming water (40°F versus 60°F) dramatically affects outlet temperature at full flow. Adjust the flow restrictor toward "-" to slow water flow, giving the heat exchanger more time to work. You can also reduce flow slightly at fixtures. Remember - the unit delivers the same BTU output year-round, but physics dictates that colder input requires more energy.
Conclusion
Eccotemp i12 lp installation transforms your home's hot water experience when you get the details right. After guiding hundreds of homeowners through this process, I can tell you that taking shortcuts always costs more in the long run.
The beauty of the i12-LP lies in its simplicity - but that simplicity depends on proper foundation work. ¾" water supply lines give you the full 4.0 GPM performance you paid for. A gas line rated for 80,000 BTU ensures reliable ignition every time. That 2.5" stainless vent with ¼" per foot slope prevents the condensation headaches that plague poorly installed units.
Your GFCI-protected electrical connection keeps the controls and exhaust fan running smoothly, while proper clearances protect your investment and your family's safety. The comprehensive leak testing we covered isn't just busywork - it's what stands between you and expensive repairs down the road.
Here's the thing about tankless water heaters: they're incredibly reliable when installed correctly, but they're unforgiving of mistakes. We've seen too many DIY installations that looked fine initially but developed problems within months. Issues like undersized gas lines causing error codes, improper venting leading to condensation damage, or inadequate water flow creating temperature fluctuations.
At Accountable Home Plumbing, we handle the complex stuff so you can enjoy endless hot water without the headaches. Our team has perfected eccotemp i12 lp installation throughout Denver, Broomfield, Westminster, Thornton, Northglenn, Arvada, Boulder, and Longmont. We know which local codes apply, which permits you need, and how to get everything inspected properly.
Our transparent pricing means you'll know exactly what your installation costs before we start. No surprise charges, no hidden fees - just honest work at a fair price. We handle all the permitting paperwork, coordinate inspections, and register your warranty so everything's properly documented.
For professional installation that protects your investment and ensures safe operation, contact us for Water Heater Repair & Installation. We're available 24/7 for emergency service and offer same-day appointments throughout the Denver Metro area.

Your new tankless water heater will serve your family for many years when it's installed right the first time. Don't hesitate to reach out if you need professional help - we're here to make sure your eccotemp i12 lp installation delivers the endless hot water experience you're looking forward to.