Complete Guide to Kitchen Plumbing Repairs and Maintenance in Denver
Your kitchen plumbing works harder than any other system in your home. Between meal prep, cleanup, and everything in between, Denver homeowners rely on functional sinks, faucets, and drains dozens of times daily. When something goes wrong, it disrupts your entire household routine and can quickly escalate into water damage, mold growth, or expensive emergency repairs.
Understanding how your kitchen plumbing system works gives you the power to catch problems early, handle minor issues yourself, and know exactly when professional intervention makes sense. Colorado's hard water, temperature swings, and unique building codes all factor into how your kitchen plumbing performs and what maintenance it needs.
1. Understanding Your Kitchen Plumbing System
Kitchen plumbing consists of two separate but interconnected systems working together. The supply side brings fresh water to your sink faucet, dishwasher, refrigerator ice maker, and any other water-using appliances through pressurized pipes. The drain-waste-vent system carries used water away through gravity-fed pipes that connect to your main sewer line or septic system. Problems can develop in either system, and understanding the basics helps you identify issues faster.
Most Denver homes have copper or PEX supply lines feeding the kitchen. Copper has been the standard for decades and typically lasts 50 years or more, though Colorado's mineral-rich water can cause internal buildup that restricts flow over time. PEX tubing has become increasingly common in newer construction and remodels because it resists scale buildup better and handles temperature fluctuations without the expansion issues that can affect rigid pipes during our cold winters.
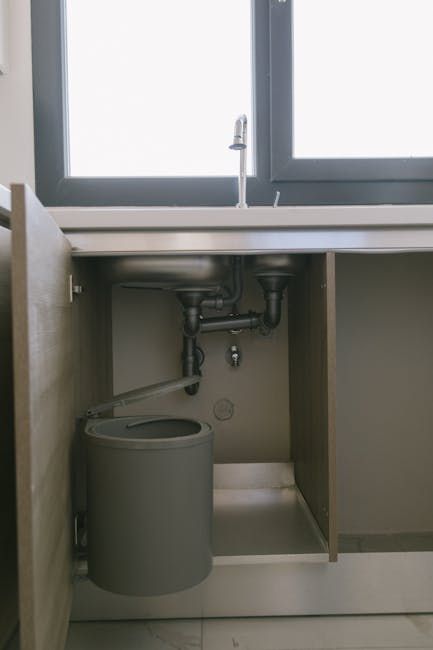
Your kitchen sink likely has individual shutoff valves located in the cabinet below. These small valves let you cut water to the sink without shutting off supply to the whole house. Finding and testing these valves before an emergency strikes saves valuable time when water is spraying everywhere. Turn them clockwise to close, counterclockwise to open, and exercise them once or twice a year to prevent the mineral deposits that can seize them in place.
The drain side uses larger pipes, typically 1.5 to 2 inches in diameter, connected through a P-trap that holds water to block sewer gases from entering your home. Kitchen drains face unique challenges compared to bathroom fixtures because they handle food particles, grease, and soap. The combination creates stubborn buildup that accumulates over years, gradually narrowing your drain pipe until water backs up. Understanding this helps explain why kitchen drains need more frequent attention than other fixtures in your home.
2. Common Kitchen Sink Problems and DIY Solutions
A dripping faucet might seem minor, but those drops add up quickly. A faucet dripping once per second wastes over 3,000 gallons annually according to EPA estimates, driving up your Denver Water bill and potentially causing mineral staining in your sink basin. Most drips result from worn internal components that you can replace yourself with basic tools and about an hour of time.
Single-handle faucets typically use a cartridge mechanism that controls both water flow and temperature mixing. When these fail, you get drips, difficulty adjusting temperature, or handles that feel loose or stiff. Replacement cartridges cost between $15 and $40 depending on your faucet brand, and the repair involves shutting off supply valves, removing the handle and retaining nut, pulling the old cartridge, and inserting the new one. Taking the old cartridge to a plumbing supply store ensures you get an exact match.
Two-handle faucets use either compression valves with rubber washers or ceramic disc cartridges. Compression faucets require you to firmly tighten the handle to stop water flow, and the rubber washers inside wear out every few years. Ceramic disc faucets feel smoother when operating and last longer, but they still eventually fail. Both types require removing the handle, unscrewing the packing nut, and extracting the valve stem or cartridge for inspection and replacement.
Low water pressure at the kitchen faucet often has a simple cause: a clogged aerator. This small screen at the tip of your spout catches debris and adds air to the water stream. Mineral deposits from Denver's hard water gradually block the tiny holes, restricting flow. Unscrew the aerator by hand or with pliers wrapped in tape to protect the finish, soak it in white vinegar overnight, scrub with an old toothbrush, and reinstall. This five-minute fix restores flow in most cases.
Sprayer heads on pull-down faucets face the same mineral buildup issues. If your sprayer dribbles weakly or sprays erratically, remove it and soak in vinegar solution. Check the hose connection under the sink too, as kinked hoses restrict water flow even when the sprayer head itself is clear. Replacement sprayer heads and hoses are widely available and usually attach with simple threaded connections.
3. Kitchen Drain Maintenance and Clog Prevention
Kitchen drains clog more frequently than any other household fixture because of what goes down them. Grease, oil, and fat from cooking seem liquid when hot but solidify as they cool inside your pipes, creating a sticky coating that traps food particles passing through. Over months and years, this buildup narrows the pipe diameter until water drains slowly and eventually stops altogether. Prevention matters far more than cure when it comes to kitchen drain health.
Never pour cooking grease down the drain, even with hot water running. Collect grease in an old can or jar and dispose of it in the trash once solidified. Wipe greasy pans with paper towels before washing to minimize the oil entering your drain. These habits alone prevent most kitchen drain clogs that Denver plumbers see on service calls.
Coffee grounds and eggshells cause problems despite common myths suggesting they help clean drains. Neither breaks down easily in water, and they accumulate in pipe bends and low spots. Dispose of coffee grounds in compost or trash, and crush eggshells for garden use rather than rinsing them down the sink.
Monthly enzyme treatments help maintain kitchen drains by breaking down organic buildup naturally. Unlike chemical drain cleaners that can damage pipes and kill beneficial bacteria in septic systems, enzyme products use biological processes to digest grease and food residue. Pour the treatment down your kitchen drain before bed, let it work overnight without running water, and flush with hot water in the morning. This proactive approach keeps drains flowing freely.
When slow drains develop despite prevention, a simple plunger often clears minor obstructions. Use a cup plunger designed for sinks rather than a flange plunger made for toilets. Fill the sink with a few inches of water, place the plunger over the drain opening to create a seal, and pump vigorously ten to fifteen times. The pressure wave dislodges clogs and restores flow in many cases. If you have a double sink, block the other drain with a wet rag to maintain pressure.
4. Garbage Disposal Care and Troubleshooting
Your garbage disposal handles more abuse than almost any kitchen appliance, grinding food waste day after day. Proper use extends its lifespan significantly while preventing the clogs and jams that send homeowners searching for emergency plumber numbers. Understanding what disposals can and cannot handle prevents most problems.
Always run cold water before, during, and after using your disposal. Cold water keeps grease solid so the blades can chop it into small pieces that flush away rather than coating pipes. Run water for at least 15 seconds after grinding stops to flush particles completely through the drain line. Hot water actually makes grease problems worse by liquefying fats that then solidify further down the pipe where you cannot reach them.
Certain items should never enter a disposal regardless of how powerful it seems. Fibrous vegetables like celery, asparagus, and corn husks wrap around the grinding mechanism. Starchy foods like pasta and rice expand with water and create paste-like clogs. Bones, fruit pits, and seafood shells can damage blades or jam the motor. Coffee grounds accumulate in pipes despite passing through the disposal easily. When in doubt, use the trash.
A humming disposal that will not spin indicates a jammed flywheel. First, turn off the power at the switch and verify by trying to turn it on. Never put your hand inside a disposal. Look for the hex wrench slot on the bottom of the unit and insert the Allen wrench provided with your disposal or a standard quarter-inch wrench. Work it back and forth to free the stuck flywheel. Press the reset button on the bottom of the unit, restore power, and test with water running.
Disposals that make no sound at all when switched on likely have a tripped overload or failed switch. Check the reset button on the bottom of the unit first. If it clicks when pressed, try operating the disposal again. No click means the overload has not tripped, pointing to an electrical issue with the switch, outlet, or motor itself. Verify the outlet works by plugging in another device, and call a professional if electrical troubleshooting exceeds your comfort level.
5. Dishwasher Connections and Common Issues
Dishwashers connect to your kitchen plumbing through supply and drain lines that can develop problems over time. Understanding these connections helps you identify whether an issue lies with the appliance itself or the plumbing supporting it. Many dishwasher problems that seem major turn out to be simple plumbing fixes.
The supply line brings hot water to your dishwasher through a dedicated shutoff valve typically located under the kitchen sink or behind the appliance. If your dishwasher is not filling properly, check this valve first. Mineral deposits can restrict flow even when the valve appears open. Turn it off completely, then back on, sometimes dislodging scale that has accumulated. If the valve feels stiff or corroded, replacement prevents future failures at inconvenient times.
Dishwasher drains connect to your sink drain or garbage disposal through a flexible hose that should loop up high under the counter before descending to the connection point. This high loop, or an air gap device if installed, prevents dirty sink water from backing up into your dishwasher. If your dishwasher has standing water in the bottom or dishes come out with residue, check that this loop has not fallen down and that the drain hose connection is clear.
The connection point between dishwasher drain and garbage disposal deserves particular attention. When disposals are replaced, installers sometimes forget to knock out the internal plug blocking the dishwasher inlet. Dishwashers connected to disposals with this plug still in place cannot drain at all. If your dishwasher suddenly stopped draining after a disposal replacement, this is likely the cause and requires removing the disposal to access the inlet and knock out the plug.

Leaks around dishwashers often originate from supply or drain connections rather than the appliance itself. Check the supply valve connection, the supply line running to the dishwasher, and the drain hose at both ends. Tightening connections or replacing cracked hoses usually solves the problem. Front-of-door leaks typically indicate a worn door gasket that you can replace yourself with a part ordered from the manufacturer.
6. When to Call a Professional Denver Plumber
Some kitchen plumbing problems exceed DIY scope due to complexity, required tools, or potential for making matters worse. Recognizing these situations saves you frustration and prevents small issues from becoming major repairs. Professional plumbers bring experience, specialized equipment, and warranty-backed work that justify the service call cost in many circumstances.
Persistent clogs that return shortly after clearing suggest problems deeper in your drain system. When plunging and drain treatments provide only temporary relief, the obstruction likely lies in the branch line connecting your kitchen to the main drain or in the main line itself. Plumbers use motorized drain snakes and video cameras to locate and clear blockages beyond the trap, identifying root causes that household methods cannot address.
Water leaking inside walls or cabinets requires immediate professional attention. You may notice water stains, musty odors, warped cabinet bottoms, or mold growth before seeing actual water. These signs indicate supply pipe leaks that are actively causing damage. Shut off water immediately using the main valve if you cannot isolate the leak with local shutoffs, then call for same-day service to minimize damage and repair costs.
Faucet replacement often makes more sense than repeated repairs on older fixtures. If your faucet needs its third repair in a few years, replacement provides better long-term value and upgrades both function and appearance. Professional installation ensures proper connections, prevents leaks, and usually includes a warranty. The cost difference between DIY and professional faucet installation is modest considering the time savings and guaranteed results.

Gas connections for stoves and cooktops should never be DIY projects. If you smell gas or suspect a leak anywhere near your range or supply line, evacuate immediately, avoid using electrical switches or phones inside, and call from outside the home. Licensed plumbers have the training and equipment to work with gas lines safely and certify repairs meet Colorado code requirements. This is one area where professional expertise is not optional.
Accountable Home Plumbing provides Denver homeowners with professional kitchen plumbing services including faucet installation, drain cleaning, disposal replacement, and emergency repairs. Our licensed technicians arrive prepared with common parts and fully equipped service vehicles to resolve most issues in a single visit. Call (720) 620-3272 for same-day service throughout Denver, Thornton, Arvada, and surrounding communities.