Fix It Fast with These Household Plumbing Essentials
Your Essential Guide to Household Plumbing Systems
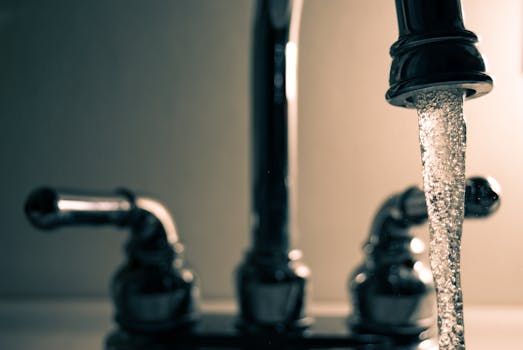
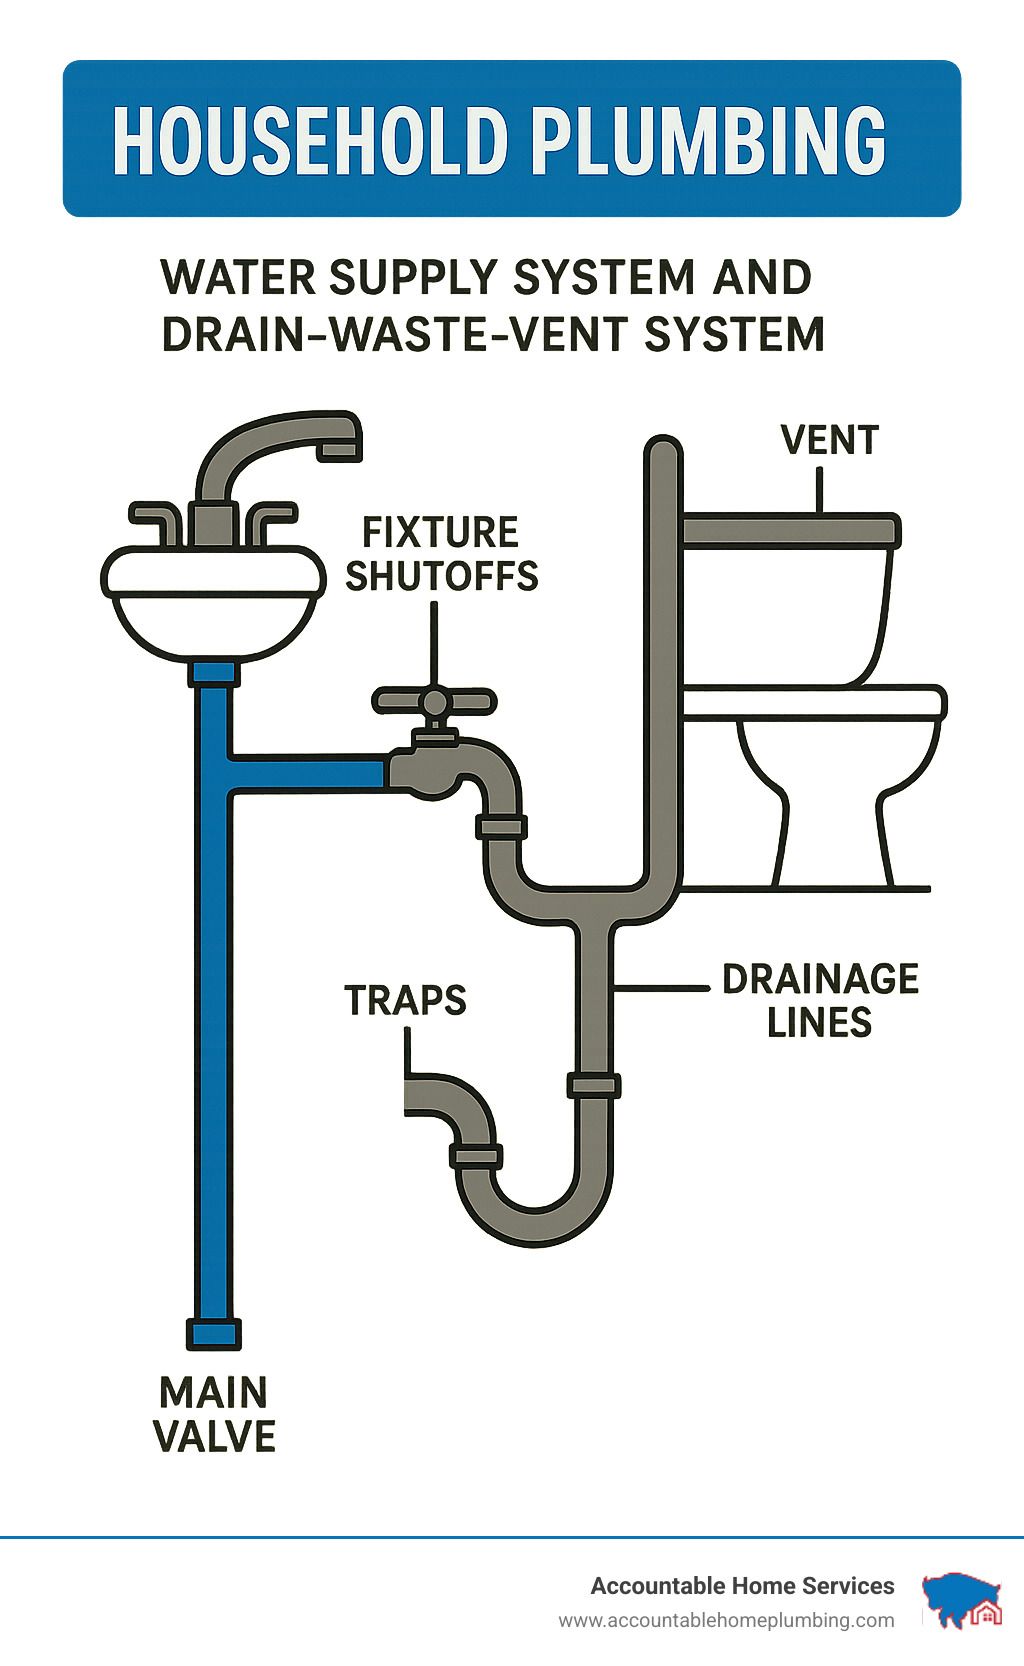
Ever wonder what's happening behind your walls when you turn on a faucet or flush a toilet? Your household plumbing is actually an ingenious network designed to both deliver clean water and carry away waste—all without you having to think about it.
Household plumbing consists of two main systems working together like a well-orchestrated dance. The Water Supply System brings fresh water into your home under pressure, while the Drain-Waste-Vent (DWV) System safely removes wastewater using gravity's natural pull. Understanding these systems can transform how you approach home maintenance.
Most homeowners only think about their pipes when something goes wrong—when water's spraying where it shouldn't or drains are backing up at the worst possible moment. But developing a basic understanding of your household plumbing can save you not just money, but also the panic that comes with unexpected leaks and clogs.
As Richard Trethewey, master plumber, wisely points out: "When you pull the plug on a bathtub, you've got 40 gallons of water that wants to scream down that pipe." It's a simple observation that highlights why proper plumbing design matters so much in our daily lives.
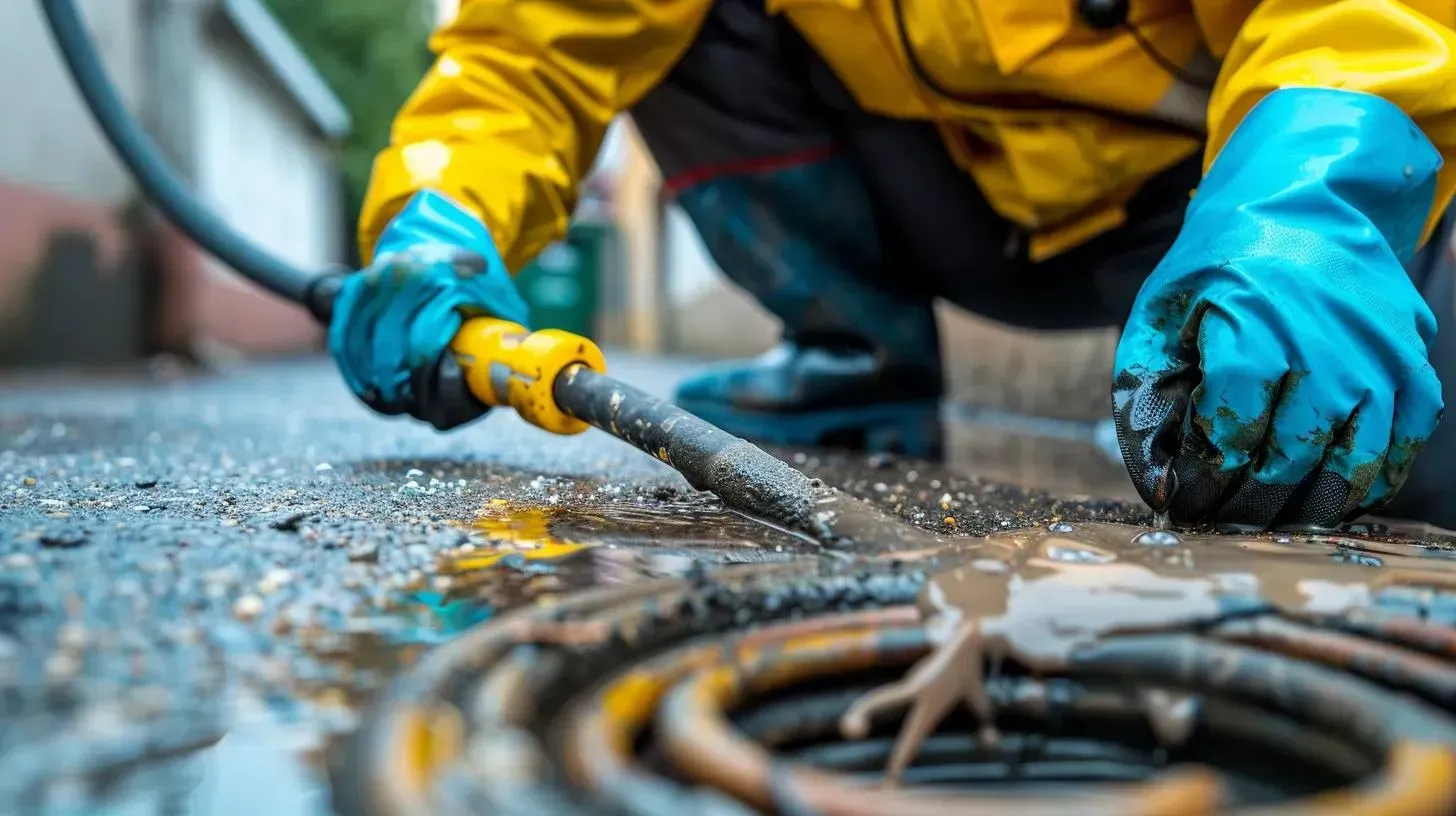
Having the right supplies at hand can mean the difference between a quick fix and a flooded bathroom floor. Whether you're facing a dripping faucet or want to prevent future headaches, a little preparation goes a long way.
Hi there—I'm Mike Martinez, owner of Accountable Home Plumbing. After spending over a decade solving household plumbing challenges throughout Denver, my team and I have seen how empowering it is when homeowners have the right tools and knowledge to handle minor issues with confidence.
We're here to help you understand what you need to keep your home's plumbing running smoothly.
1. Main Water Shutoff Valve Upgrade
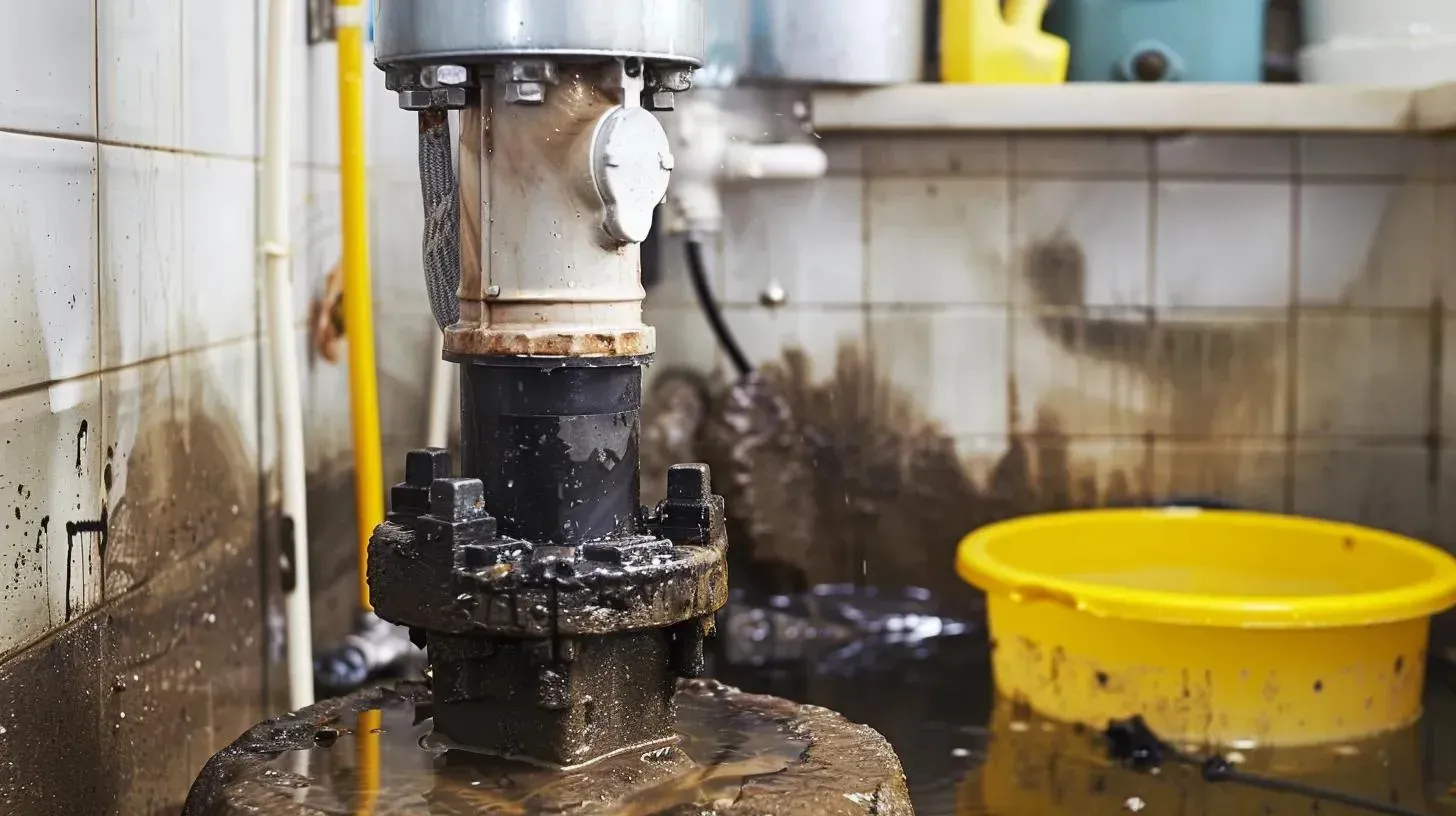
Think of your main water shutoff valve as the master switch for your entire home's water supply. When a pipe bursts at 2 AM or you find a major leak while renovating, this humble device becomes your best friend. It's the first line of defense in your household plumbing system, giving you immediate control when every second counts.
I've seen countless Denver homeowners face preventable water damage simply because their outdated gate valves failed when needed most. As master plumber Richard Trethewey wisely points out, "Supply pipes that aren't anchored every six feet or so will rattle and thump every time a faucet is turned off." This constant vibration puts stress on connections throughout your system, making a reliable shutoff valve even more crucial.
Many older homes throughout Aurora, Lakewood, and other Denver suburbs still have original gate valves that have gradually seized up over decades. Upgrading to a modern quarter-turn ball valve isn't just smart preventative maintenance—it's one of the most impactful improvements you can make to your household plumbing system.
Benefits & Selection
Not all shutoff valves are created equal. When choosing your new main valve, durability should be your top priority. Brass valves offer exceptional longevity and resist corrosion, even in areas with hard water like we have in Colorado. The quarter-turn action of ball valves means you can shut off water flow with a quick 90-degree twist—crucial when water is spraying everywhere and seconds matter.
Proper valve sizing is essential—most Denver homes use either 3/4" or 1" supply lines. For peace of mind, select valves rated for at least 150 PSI. And for drinking water safety, always choose lead-free models that comply with current regulations.
A quality ball valve typically runs between $15-$40, depending on size and features. For homeowners in colder areas like Broomfield or Westminster, consider models with drain ports that allow you to remove residual water from pipes during freezing weather. The investment is minimal compared to the thousands in potential water damage it can prevent.
Installation Steps
While I recommend professional installation for most homeowners, understanding the process helps you make informed decisions:
First, locate your existing main valve—typically where the water line enters your home, often in the basement or utility room. You'll need to turn off water at the street by closing the municipal valve at the meter (your utility company may need to help with this).
After shutting off the water supply, depressurize your system by opening faucets throughout your home to drain remaining water. With proper wrenches, carefully remove the old valve and prepare the new connections with pipe thread compound or Teflon tape for a watertight seal.
Once installed, test for leaks by slowly restoring water and checking all connections. Finally, label the valve clearly so everyone in your household knows its location and function during an emergency.
For most Denver Metro homes, this is a job best handled by licensed professionals who ensure proper installation and code compliance. Water damage can quickly cost thousands, so don't take chances with this critical component. Learn more about our emergency repair services if you need assistance with valve replacement or have questions about your home's shutoff system.
2. PEX Pipe & Fittings Starter Kit
If you've been in a home built or remodeled in the last decade, chances are you've got PEX piping behind those walls. This flexible, colorful tubing has completely transformed how we approach household plumbing projects—and for good reason!
PEX (cross-linked polyethylene) has become the go-to choice for modern plumbing systems because it strikes that perfect balance between performance and practicality. Unlike the copper pipes your grandparents had, PEX bends around corners with ease, reducing the number of connections needed and lowering the risk of future leaks. It's also remarkably resistant to freezing—a huge plus for those bitter Colorado winter nights when temperatures plummet in places like Arvada or Westminster.
One of my favorite features is the simple color-coding: red for hot water lines, blue for cold. This makes identifying pipes incredibly straightforward, even years later when you're trying to figure out which line goes where.
For homeowners in older Denver neighborhoods tackling renovation projects, PEX is particularly valuable. Its flexibility means we can often snake it through existing walls without tearing everything apart—saving both time and drywall repairs!
When you're putting together your own PEX starter kit, look for these basics: 50-100 feet each of 1/2" red and blue tubing, an assortment of fittings (couplings, elbows, and tees), crimp rings or clamps, and a crimping tool (which you can often rent if you're only doing a small project).
Cutting & Crimping Basics
Working with PEX isn't complicated, but there are some techniques that ensure leak-free connections every time. First, always use a dedicated PEX cutter for clean, square cuts. Those standard pipe cutters might work in a pinch, but they often create burrs that can compromise your connections.
When prepping a fitting, slide the crimp ring over the pipe first, then push the fitting in until it fully seats against the shoulder. You'll feel it when it's all the way in. Position your crimping tool perpendicular to the pipe and compress completely—halfway doesn't cut it here!
The most important step that DIYers often skip? Using a go/no-go gauge to verify proper crimp compression. This simple tool tells you whether your connection meets industry standards. As I often tell my customers, "This little $10 tool can save you thousands in water damage repairs."
Always pressure test new connections before closing up walls. Apply 60-70 PSI and check carefully for leaks. Despite PEX's flexibility, it still needs proper support—secure it every 32 inches horizontally to prevent sagging. As one plumbing expert likes to say, "Flexible doesn't mean it can defy gravity!"
Household Plumbing Code Checkpoints
Before diving into any significant household plumbing project with PEX, take a moment to check these important code considerations:
Most Denver Metro municipalities require permits for plumbing work beyond simple repairs. Skip this step and you might face fines or complications when selling your home.
Pay attention to manifold requirements—some local jurisdictions have specific rules about PEX manifold installations that differ from the general code. Keep PEX at least 12 inches from high-heat sources like flue pipes to prevent damage, and be aware that special requirements may apply when running PEX through fire-rated walls.
Boulder and Longmont residents should be particularly careful, as these cities often have their own amendments to the International Plumbing Code that can affect your project.
Not sure if your PEX installation will meet code? That's where we come in. At Accountable Home Plumbing, we stay current on all local code requirements throughout the Denver Metro area, ensuring your project is done right the first time. Whether you need advice on a DIY project or prefer to leave the whole job to professionals, we're here to help with transparent pricing and dependable service.
3. Pressure-Balancing Shower Valve
Ever been in the shower when someone flushes a toilet, and suddenly you're doing a dance to avoid being scalded? That's where a pressure-balancing shower valve becomes your bathroom hero. This clever device is one of the most worthwhile household plumbing upgrades you can make, especially if you have little ones or older folks at home.
These valves do exactly what their name suggests – they balance water pressure to maintain a consistent temperature, even when demands on your water system change elsewhere in the house. No more surprise hot flashes when the washing machine kicks on or frigid blasts when someone runs the kitchen faucet!
Safety experts tell us that water above 120°F can cause serious burns in just minutes. That's pretty scary, especially in homes with curious toddlers or grandparents who might have slower reaction times. A good pressure-balancing valve eliminates this worry with built-in temperature regulation.
Key Features
When shopping for your new shower valve, look for one with solid anti-scald protection that automatically limits maximum temperature. This feature alone is worth every penny for the peace of mind it brings.
The best valves use ceramic cartridges rather than rubber washers. They cost a bit more upfront but operate smoothly and last years longer – saving you from the drip, drip, drip that drives everyone crazy.
I always recommend choosing valves with universal trim compatibility. This smart design lets you update the look of your shower years down the road without having to tear into your walls to replace the valve itself. Just swap the visible parts and voilà – instant bathroom refresh!
For Denver homes with older plumbing systems that might have pressure fluctuations, pressure compensation features are particularly valuable. These keep your shower temperature steady even when pressure drops dramatically in either the hot or cold lines.
Finally, don't skimp on construction quality. Solid brass valves might cost more initially, but they resist corrosion and stand up to our mineral-rich Colorado water much better than cheaper alternatives.
If you live in higher-end neighborhoods like Boulder or downtown Denver, you might consider upgrading to thermostatic valves. These premium options offer even finer temperature control and additional features that complement luxury bathroom designs.
Household Plumbing Safety Tips
When it comes to installing shower valves, safety should be your top priority. Always turn off your water supply completely before starting any work. This seems obvious, but you'd be surprised how many emergency calls we get from folks who skipped this crucial step!
Before purchasing, verify compatibility with your existing plumbing. Measure pipe sizes and check your shower configuration to ensure the valve will fit properly. Nothing's more frustrating than getting halfway through installation only to find you need different parts.
Pay careful attention to depth requirements during installation. Most valves need to be set at a specific distance from the finished wall surface to function correctly and allow proper trim installation.
After installation, test pressure gradually. Turn the water back on slowly and check for leaks before closing up your walls. A small drip now can become a big problem later if not addressed.
Don't forget to set the temperature limiter on your new valve. This adjustable feature lets you cap the maximum temperature to prevent scalding – I usually recommend setting it so the hottest water is around 110-115°F for most households.
Finally, keep your product documentation in a safe place. Future homeowners (or your future self) will thank you when maintenance is needed down the road.
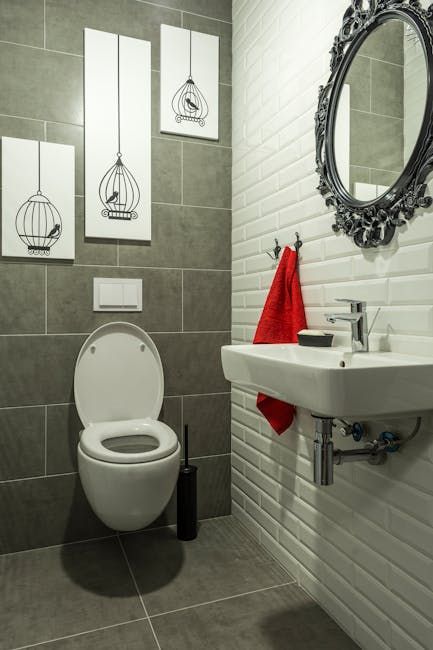
Creating accessible cleanouts at main exits and direction changes is another smart move when updating bathroom plumbing. This foresight makes future maintenance much easier and less destructive to your beautiful bathroom.
For most homeowners, installing a shower valve falls into the "probably should call a pro" category. The complexity of household plumbing systems and the potential for water damage make this a job best left to experienced hands. Learn more about our water heater and plumbing services if you're thinking about upgrading your shower experience.
4. Smart Leak Detector & Alarm
Ever had that sinking feeling when you find water damage that's been happening for who knows how long? You're not alone. Water damage from sneaky, undetected leaks costs homeowners billions every year. That's where smart leak detectors come in – they're like having a 24/7 plumbing assistant keeping watch over your household plumbing.
Think about it – by the time you notice a spike in your water bill, that tiny drip may have already caused extensive damage to your floors, walls, or foundation. Modern smart detectors change the game entirely by alerting you to problems within seconds of detection, potentially saving you thousands in repairs.
These clever devices use sensors to detect either the presence of water or unusual flow patterns, then immediately send alerts straight to your smartphone – even when you're miles away from home. For busy Denver Metro residents who travel frequently or own vacation properties in the mountains, this technology provides incredible peace of mind.
Placement Guide
The key to making these detectors work effectively is strategic placement. Your household plumbing system has several vulnerable spots where leaks commonly begin.
Place sensors near the base of your water heater, which is often ground zero for leaks as units age. Position them under kitchen and bathroom sinks where pipe connections can loosen over time. Behind washing machines is another critical spot – a burst supply hose can release up to 500 gallons per hour!
Don't forget areas that often go unchecked, like beneath dishwashers, under refrigerators with water connections, and near your main water shutoff valve. In basements, focus on natural low points where water tends to collect first.
For the most comprehensive protection, consider whole-house systems that monitor water flow at the main line. These sophisticated systems can actually detect unusual patterns and automatically shut off your water supply before significant damage occurs – perfect for those Colorado winter getaways when pipes might freeze.
Response Plan
When your leak detector sounds the alarm, having a clear response plan can make all the difference:
First, verify the alert by checking the affected area to confirm water is actually present. Then immediately shut off the appropriate valves closest to the leak source – this is where knowing the location of all your shutoff valves really pays off.
Be sure to document any damage with photos for insurance purposes before you start cleanup. Quickly remove standing water and begin drying affected materials to prevent mold growth, which can start in as little as 24-48 hours.
Next, try to identify the source of the leak. Is it a simple fix like a loose connection you can tighten, or something more complex? Don't hesitate to contact professionals if you're unsure – attempting complex plumbing repairs without proper knowledge can sometimes make things worse.
"We once had a customer whose smart detector alerted them to a small leak behind their refrigerator while they were on vacation," shares Mike from Accountable Home Plumbing. "That early warning prevented what could have been thousands in kitchen floor and cabinet damage."
As an added protective measure, consider insulating exposed pipes in unheated areas – especially important in areas like Broomfield or Westminster where temperatures regularly dip below freezing. This simple step works hand-in-hand with leak detection to prevent problems before they start.
For more information on how household plumbing systems work and additional ways to protect them, check out this scientific research on plumbing system basics.
5. DIY Household Plumbing Tool Kit
There's something incredibly empowering about having the right tools on hand when water starts spraying where it shouldn't. Every Denver home needs a basic household plumbing tool kit ready for those inevitable minor emergencies that always seem to happen at the most inconvenient times.
I've seen the relief on homeowners' faces countless times when they're able to stop a leak or clear a clog themselves instead of waiting anxiously for a professional to arrive. Those simple fixes can prevent water damage and save you hundreds in emergency service calls.
Think of your plumbing tool kit as insurance for your peace of mind. When your toilet starts overflowing at 11 PM or a faucet won't stop dripping during a holiday weekend, having the right tools ready makes all the difference.
Your essential toolkit should include a quality plunger (both cup and flange styles for different fixtures), adjustable pipe wrenches in two sizes, and a specialized basin wrench for those impossible-to-reach nuts behind sinks. Add in some channel-lock pliers, a 25-foot pipe snake for stubborn clogs, and Teflon tape for creating watertight connections, and you're well on your way to handling common issues.
Don't forget plumber's putty for sealing drains, silicone caulk for waterproofing around fixtures, and an assortment of rubber washers for quick faucet repairs. An adjustable wrench, hacksaw, and pipe cutter round out the essentials, with a drain cleaning bladder (that attaches to your garden hose) offering powerful backup for stubborn clogs.
For residents in older neighborhoods like Northglenn or Thornton where homes might have aging galvanized pipes, consider adding specialized tools for working with these systems—they have unique challenges that newer copper or PEX systems don't present.
Usage Hacks for Household Plumbing Emergencies
The difference between success and frustration often comes down to technique. When using a plunger, create a tight seal and use forceful push-pull motions rather than random jabbing. For toilets, make sure there's enough water to cover the plunger cup completely.
When cleaning sink traps, always place a bucket underneath before loosening—you'll thank me when you're not mopping the floor afterward! Turn the slip nuts counterclockwise to loosen, and take a quick photo with your phone before disassembly to make reassembly easier.
For faucet repairs, always turn off the water supply valves under the sink first—a step I've seen skipped too many times with predictably wet results. And did you know a running toilet can waste up to 200 gallons per day? Simply adjusting the float height or replacing the flapper can fix this common issue and save significantly on your water bill.
If you find a small pipe leak and need a temporary fix until we can get there, tightly wrap silicone tape around the leak point. It's not permanent, but it can buy you valuable time and prevent damage to your home.
"The most expensive tool is the one you don't have when you need it," my grandfather used to say. This is especially true with household plumbing emergencies where a $5 tool can prevent thousands in water damage.
Maintenance Musts
Tools need care too! After each use, take a moment to clean off any debris, especially from drain snakes which can harbor some pretty unpleasant stuff. Dry metal tools thoroughly to prevent rust, and occasionally apply light machine oil to the moving parts of wrenches and pliers.
Replace worn components like pipe cutter blades when they start to dull. Keep your tools organized so you can find what you need quickly during an emergency—that's not the time to be digging through a jumbled toolbox! And regularly check rubber components for cracks or deterioration that could cause them to fail when you need them most.
While these tools will help you handle many common household plumbing issues, some problems require professional expertise. When you're in over your head, our team at Accountable Home Plumbing is ready to help. For more information about our professional services when DIY isn't enough, visit our General Plumbing Services page.
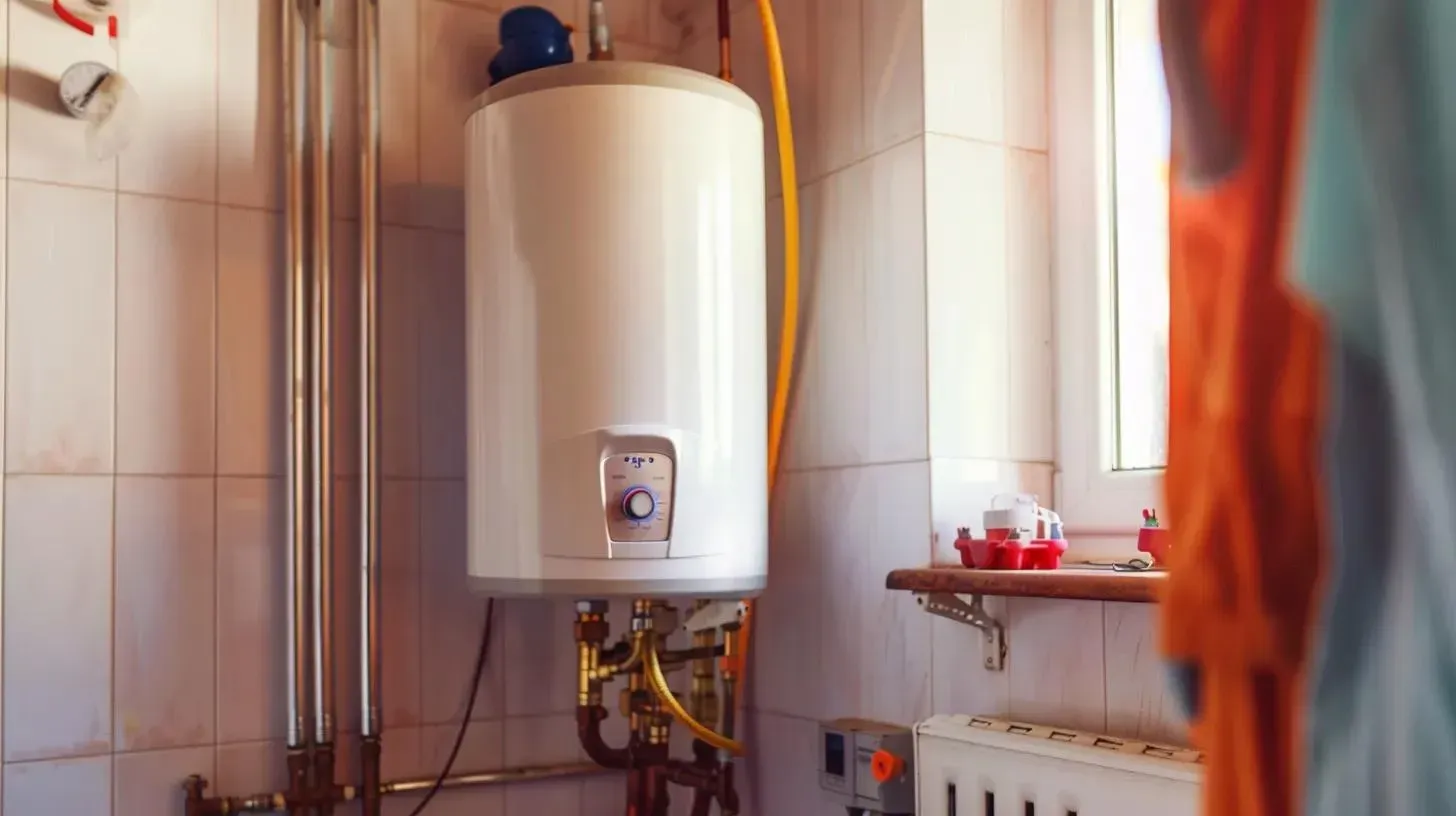
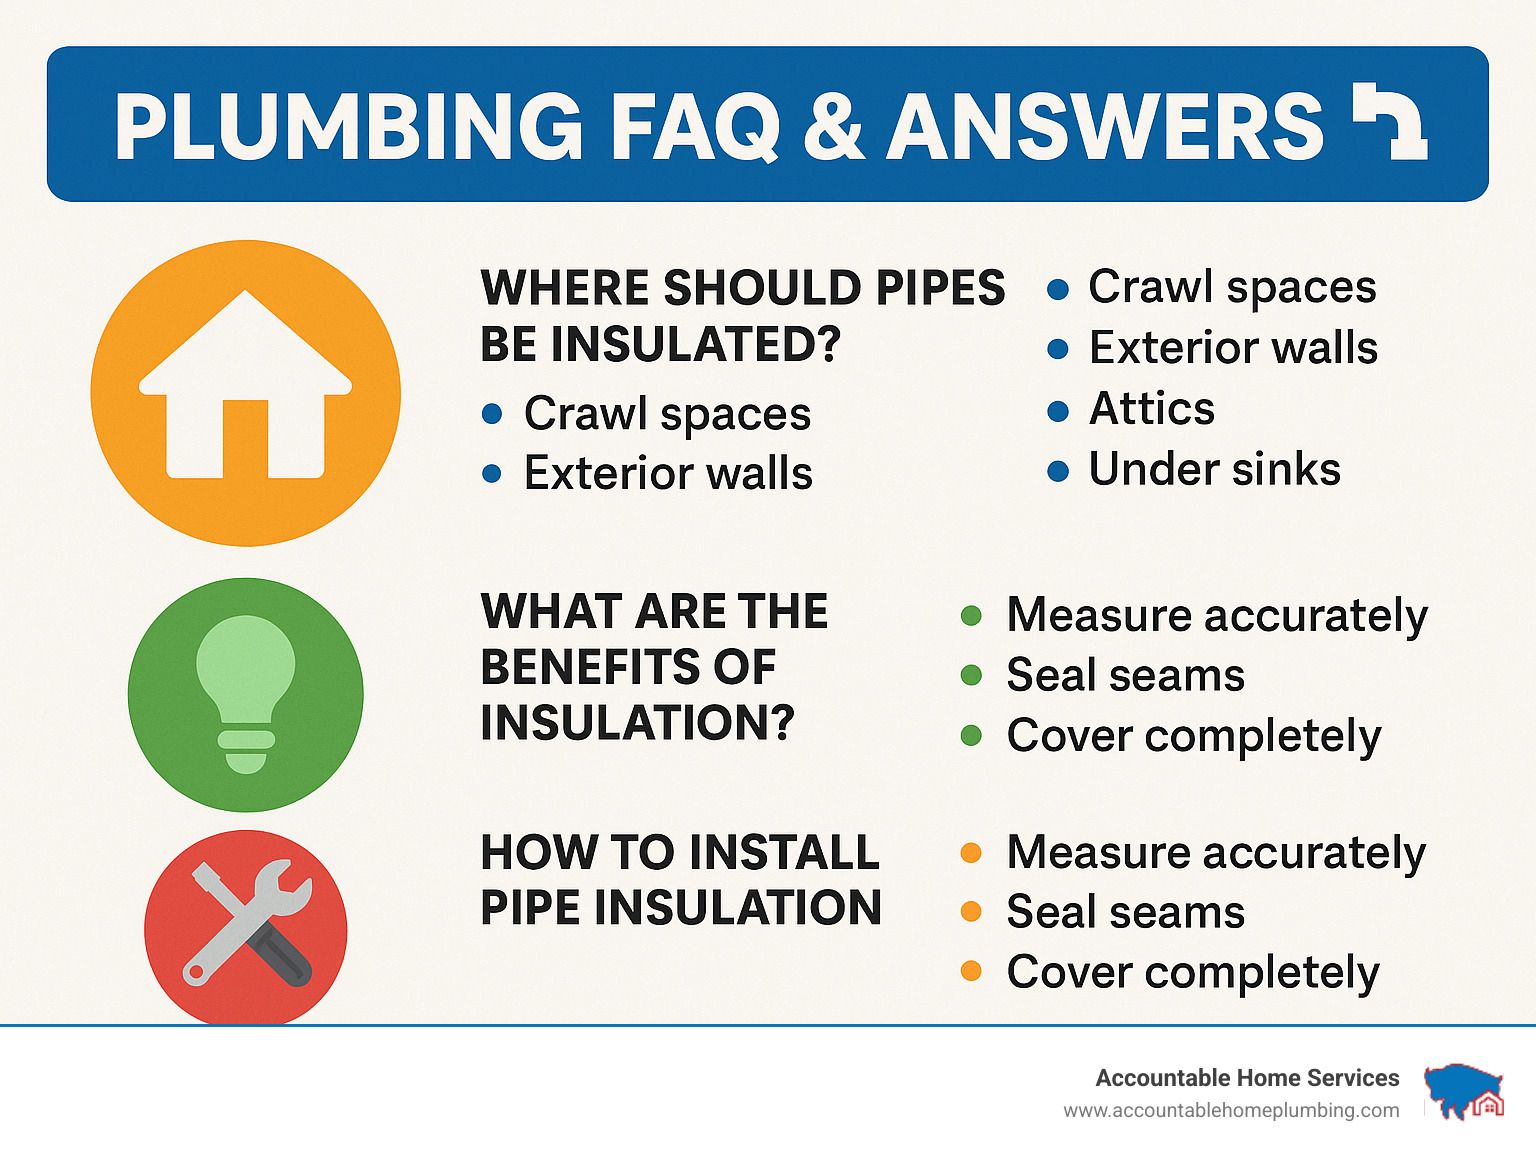
6. Insulated Pipe Wrap & Heat Cable
Those of us living in the Denver Metro area know all too well how quickly temperatures can plummet during winter months. When the mercury drops, your household plumbing faces serious risks. I've seen how devastating frozen pipes can be for homeowners – that tiny 1/8-inch crack from a freeze can release up to 250 gallons of water daily into your home, turning a minor issue into a major catastrophe.
If you live in higher elevation neighborhoods like Boulder or western Arvada, your pipes are especially vulnerable during cold snaps. The good news? A little prevention goes a surprisingly long way, and proper pipe insulation is one of the most affordable insurance policies you can buy for your home.
Choosing Materials
Walking down the plumbing aisle can feel overwhelming with all the insulation options, but choosing the right materials doesn't have to be complicated:
Foam pipe sleeves are my go-to recommendation for most homeowners tackling this project themselves. These pre-slit tubes simply slip over straight pipe runs and provide excellent protection for minimal cost. For those awkward bends and fittings, fiberglass wrap offers the flexibility you need, plus it comes with a vapor barrier that prevents condensation.
For homes in particularly frigid spots, consider upgrading to rubber pipe insulation with its higher R-value. It costs a bit more but provides superior protection when temperatures really nosedive.
If you're insulating pipes in severely exposed areas, don't overlook heat cables as a supplement to your insulation. Just be sure to select UL-listed products with built-in thermostats – they'll only activate when temperatures approach freezing, saving you money on your electric bill while still protecting your pipes.
As a general rule, pipes in interior unheated spaces need minimum 1/2" thick insulation, while exterior or severely exposed areas should get at least 3/4" to 1" thick protection. When in doubt, go thicker – the small additional cost is nothing compared to the potential damage of a burst pipe.
Install in Cold Zones
After 15 years of plumbing in Colorado, I've developed a sixth sense for where pipes are most likely to freeze. Focus your efforts on these high-risk areas:
Your home's crawl spaces are particularly vulnerable, as they're often poorly heated and exposed to cold air infiltration. Similarly, any pipes running along exterior walls need extra attention – especially on the north-facing side of your home where sunshine rarely provides natural warming.
Don't forget about pipes in your attic or garage – these unheated spaces can get surprisingly cold. And check under sinks, particularly in cabinets against exterior walls – these enclosed spaces can trap cold air and prevent your home's heating from reaching the pipes.
Here's a little bonus many homeowners don't realize: insulating your hot water pipes doesn't just prevent freezing – it also reduces heat loss, saving energy and allowing you to lower your water heater temperature. That means you'll see benefits year-round, not just during winter months.
When installing insulation, measure accurately and cut pieces slightly longer than needed for a tight fit. Seal all seams with duct tape or manufacturer-recommended tape, ensuring no sections of pipe remain exposed. Secure everything properly with zip ties or insulation tape every 12-18 inches, and be sure to keep the insulation dry to maintain its effectiveness.
If you're heading south for winter (smart move!), take additional precautions before leaving. Maintain minimum heat levels in your home and consider shutting off the main water supply if you'll be gone for an extended period. A little preparation now can prevent a flood of problems later.
For more detailed information on preventing leaks in your household plumbing system, check out this scientific research on leak prevention from the EPA.
Frequently Asked Questions about Household Plumbing Essentials
What tools fix most leaks fast?
When water's spraying everywhere and panic sets in, having the right tools can turn a potential disaster into a quick fix. In my years servicing homes across Denver, I've found that an adjustable wrench is often your best first line of defense, perfect for tightening those loose connections that cause most minor leaks.
For more stubborn situations, a quality pipe wrench gives you the leverage needed to grip and turn pipes without damaging them. Don't underestimate the humble plumber's tape either – this thin white tape creates watertight seals on threaded connections and has saved countless homeowners from calling for emergency service.
If you find an actual crack or hole in a pipe, silicone tape can be a lifesaver for temporary repairs. It creates a waterproof barrier when wrapped tightly around the damaged area. For straight pipe sections with pinhole leaks, pipe repair clamps provide a quick solution until permanent repairs can be made.
Your main water shutoff valve is truly your best emergency tool. As we tell all our Accountable Home Plumbing customers: knowing where this valve is located and ensuring it works properly is absolutely essential for preventing extensive water damage when serious leaks occur.
How do I know which pipe material to choose?
The "pipe puzzle" confuses many homeowners, and for good reason! With several options available, making the right choice depends on multiple factors specific to your home and needs.
Consider your specific application first – supply lines that deliver fresh water under pressure have different requirements than drain lines that rely on gravity. Local building codes throughout the Denver Metro area may also restrict certain materials in specific applications, so always check before starting any project.
Your budget naturally plays a major role, as materials vary significantly in cost. Your comfort with DIY installation should factor in too – some materials require specialized tools and techniques that might be better left to professionals. Even your home's water quality matters, as certain water compositions can affect pipe longevity.
For most modern household plumbing scenarios, PEX tubing has become my go-to recommendation for supply lines. Its flexibility makes installation easier in tight spaces, it resists freezing better than rigid pipes, and the color-coding (red for hot, blue for cold) simplifies identification. I've installed PEX in countless homes from Arvada to Westminster with excellent results.
Copper remains the gold standard for durability and reliability, though it comes with a higher price tag and requires more skill to install properly. For drain lines, PVC provides excellent value and workability, while ABS offers superior impact resistance that's beneficial in exposed installations.
When in doubt, consulting with a professional can save you from costly mistakes. We're always happy to discuss the best options for your specific situation.
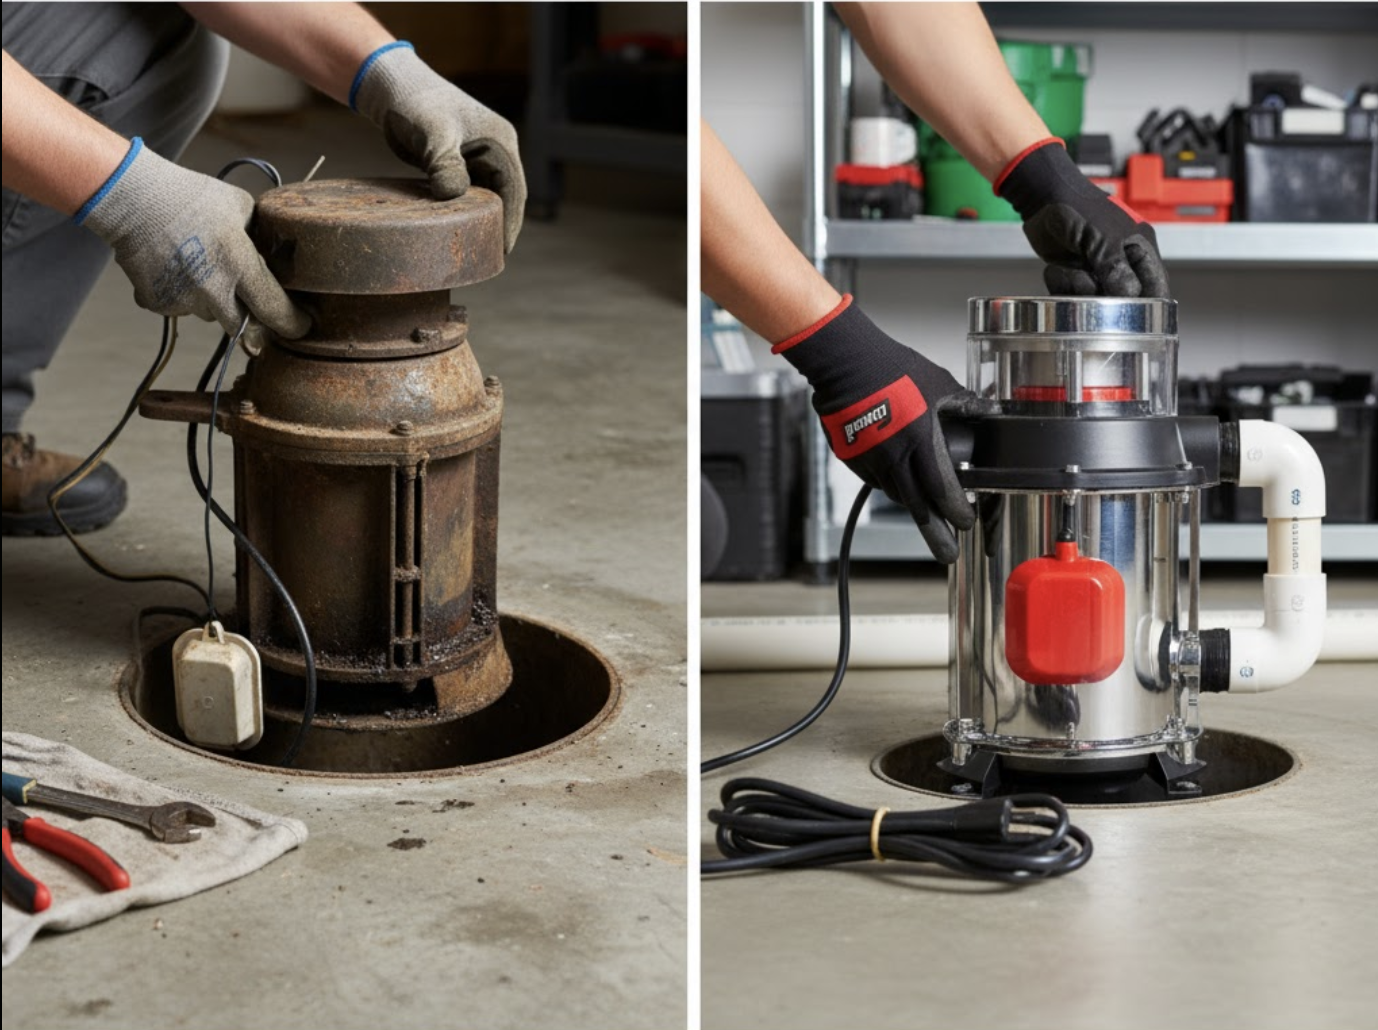
When should I replace my shutoff valve?
That little valve hiding under your sink might not seem important—until it fails when you need it most. Knowing when to replace shutoff valves can prevent major headaches down the road.
Age is a primary consideration. Valves that have served faithfully for 15-20 years have likely reached the end of their reliable lifespan. If you notice difficulty operating the valve—stiffness or inability to turn completely—that's your valve sending distress signals.
Visible corrosion is another clear warning sign. Those greenish deposits on brass valves indicate deterioration that can lead to failure. Even minor leaking around the stem or handle warrants attention, as these issues typically worsen over time.
After experiencing water damage from flooding, valves that were submerged should be inspected and likely replaced. And if you're already doing renovations, that's the perfect opportunity to upgrade your valves without additional disruption.
I've seen too many Denver homeowners find too late that their old gate valves (the ones requiring multiple turns) have seized up completely. Whenever possible, I recommend replacing these with modern quarter-turn ball valves that provide more reliable operation when you need it most.
For older homes in Thornton or Northglenn, consider implementing a systematic valve replacement program during renovations. Installing individual shutoff valves for each fixture is one of the smartest upgrades you can make—allowing you to isolate problems without disrupting water service to your entire home.
At Accountable Home Plumbing, we're always available to help assess your valves and recommend the right replacements for your household plumbing system. A small investment now can prevent major expenses later.
Conclusion
There's something deeply satisfying about having the right tools and supplies when a household plumbing issue strikes. That feeling of confidence when you can reach for exactly what you need instead of panicking – it's worth every penny spent on preparation.
Throughout this guide, we've explored essential items that can truly save the day – from that critical main shutoff valve upgrade to smart leak detectors that send alerts straight to your phone. These aren't just random purchases; they're strategic investments in your home's protection and your family's comfort.
I've seen how Denver's unique climate challenges our plumbing systems. Those winter freezes can wreak havoc on exposed pipes, while our region's occasionally hard water quietly damages fixtures and appliances. The supplies we've recommended address these specific regional concerns while providing protection that works anywhere.
Regular maintenance might not be exciting, but it's remarkably effective. Spending a few minutes each month inspecting visible pipes, cleaning drains, and making sure everyone in your household knows where the main shutoff valve is located can prevent thousands in water damage. As my grandfather used to say, "Take care of your pipes, and they'll take care of you."
For those DIY-minded homeowners across Broomfield, Westminster, Thornton, Northglenn, Arvada, Boulder, Denver, and Longmont – the essentials we've covered will handle many common situations. But even the most prepared homeowners occasionally need professional help, and that's perfectly okay.
At Accountable Home Plumbing, we're your neighbors who happen to be plumbing experts. We provide 24/7 emergency service with upfront pricing and no surprise fees. Our team brings years of experience with local household plumbing systems to every job, large or small. Learn more about our comprehensive services for those times when professional assistance makes the most sense.
The best approach to household plumbing combines your own knowledge and preparation with professional support when needed. With the right supplies on hand, basic understanding of your home's systems, and a reliable plumber's number in your contacts, you can face plumbing challenges with confidence instead of dread.